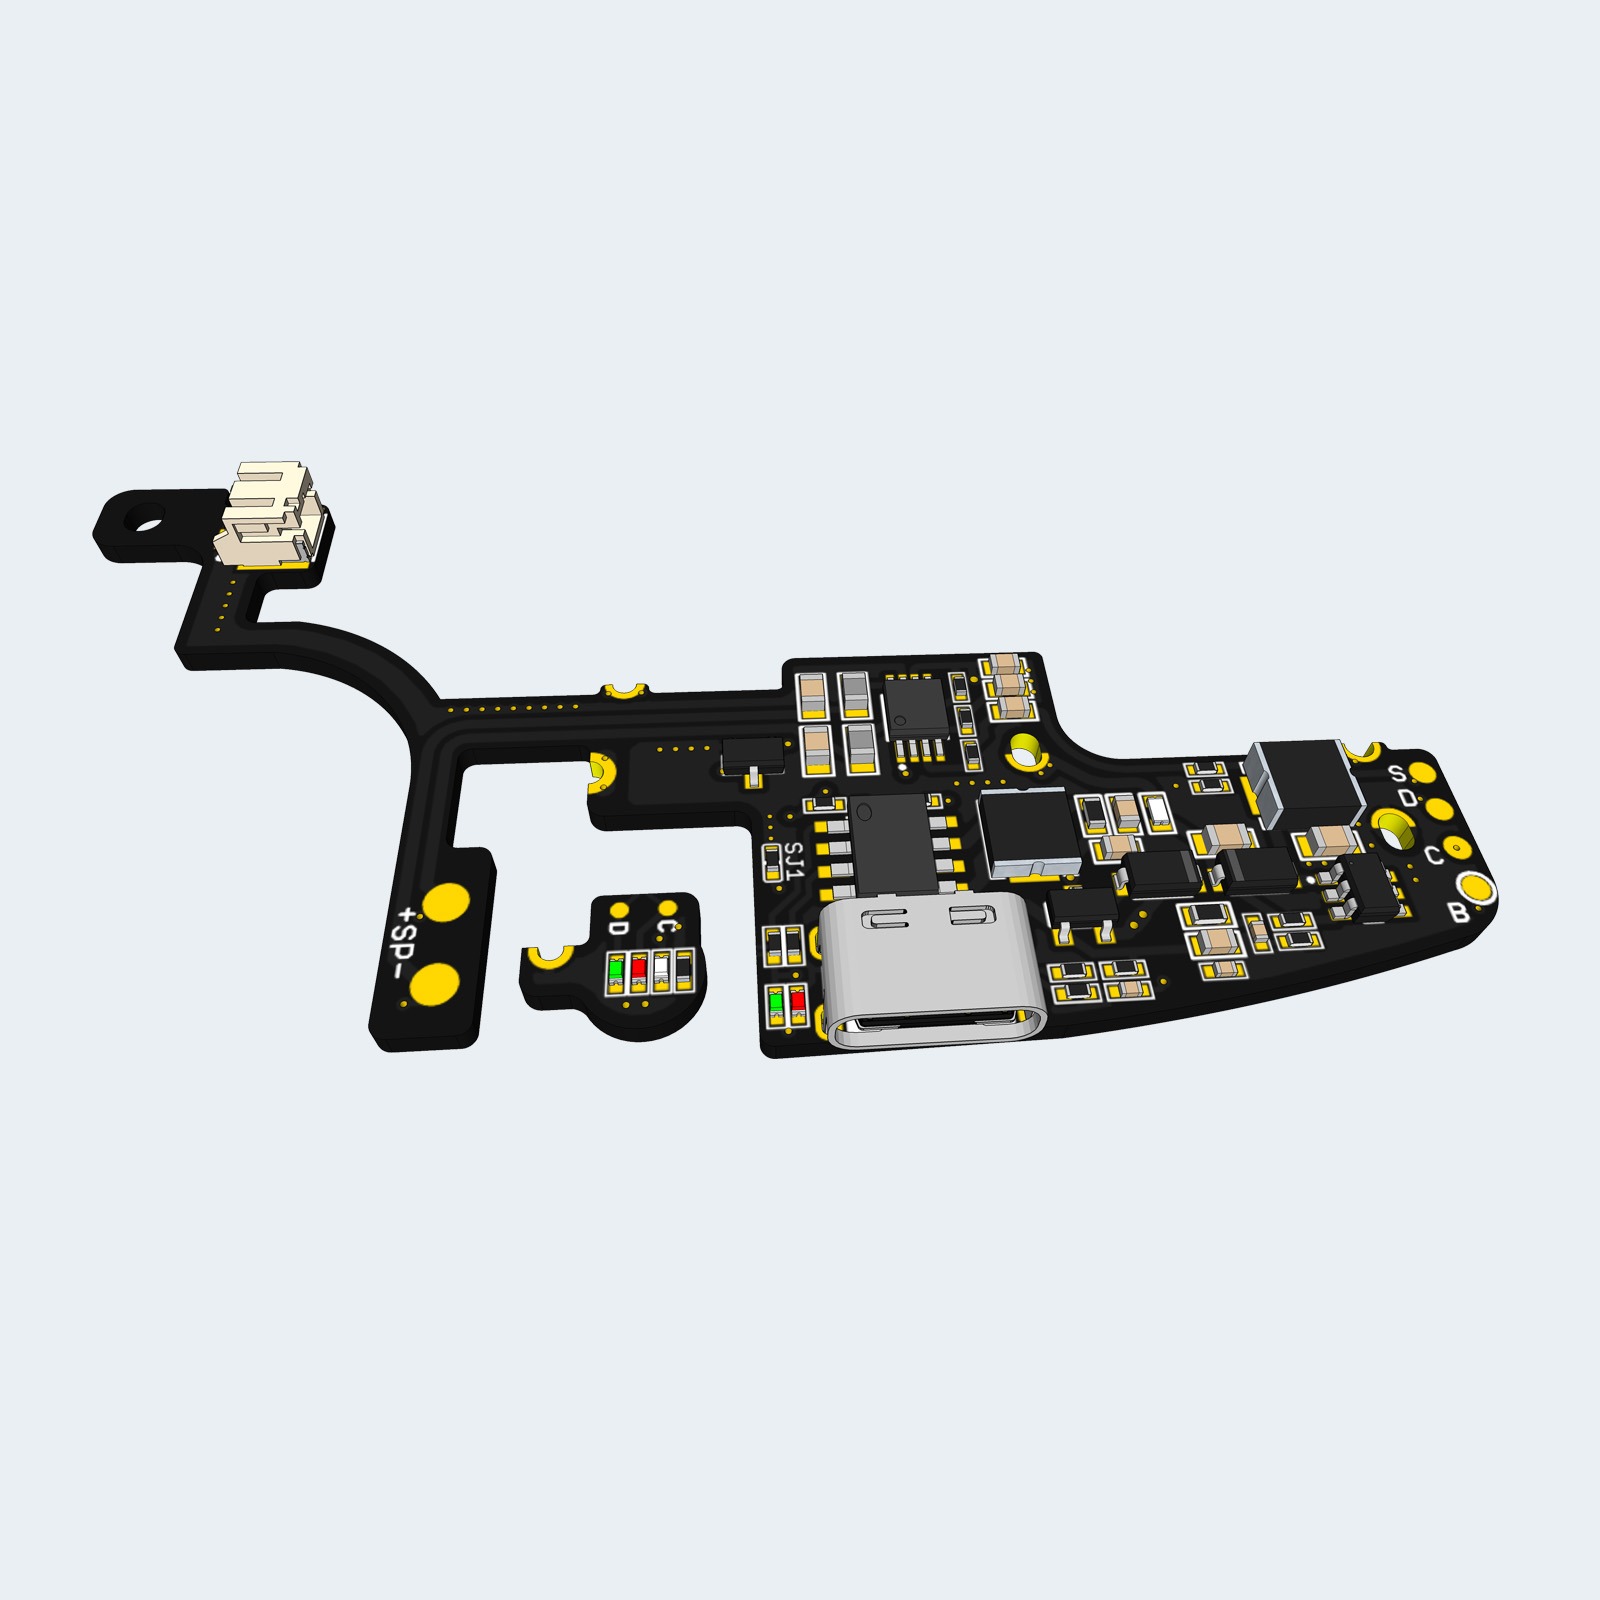
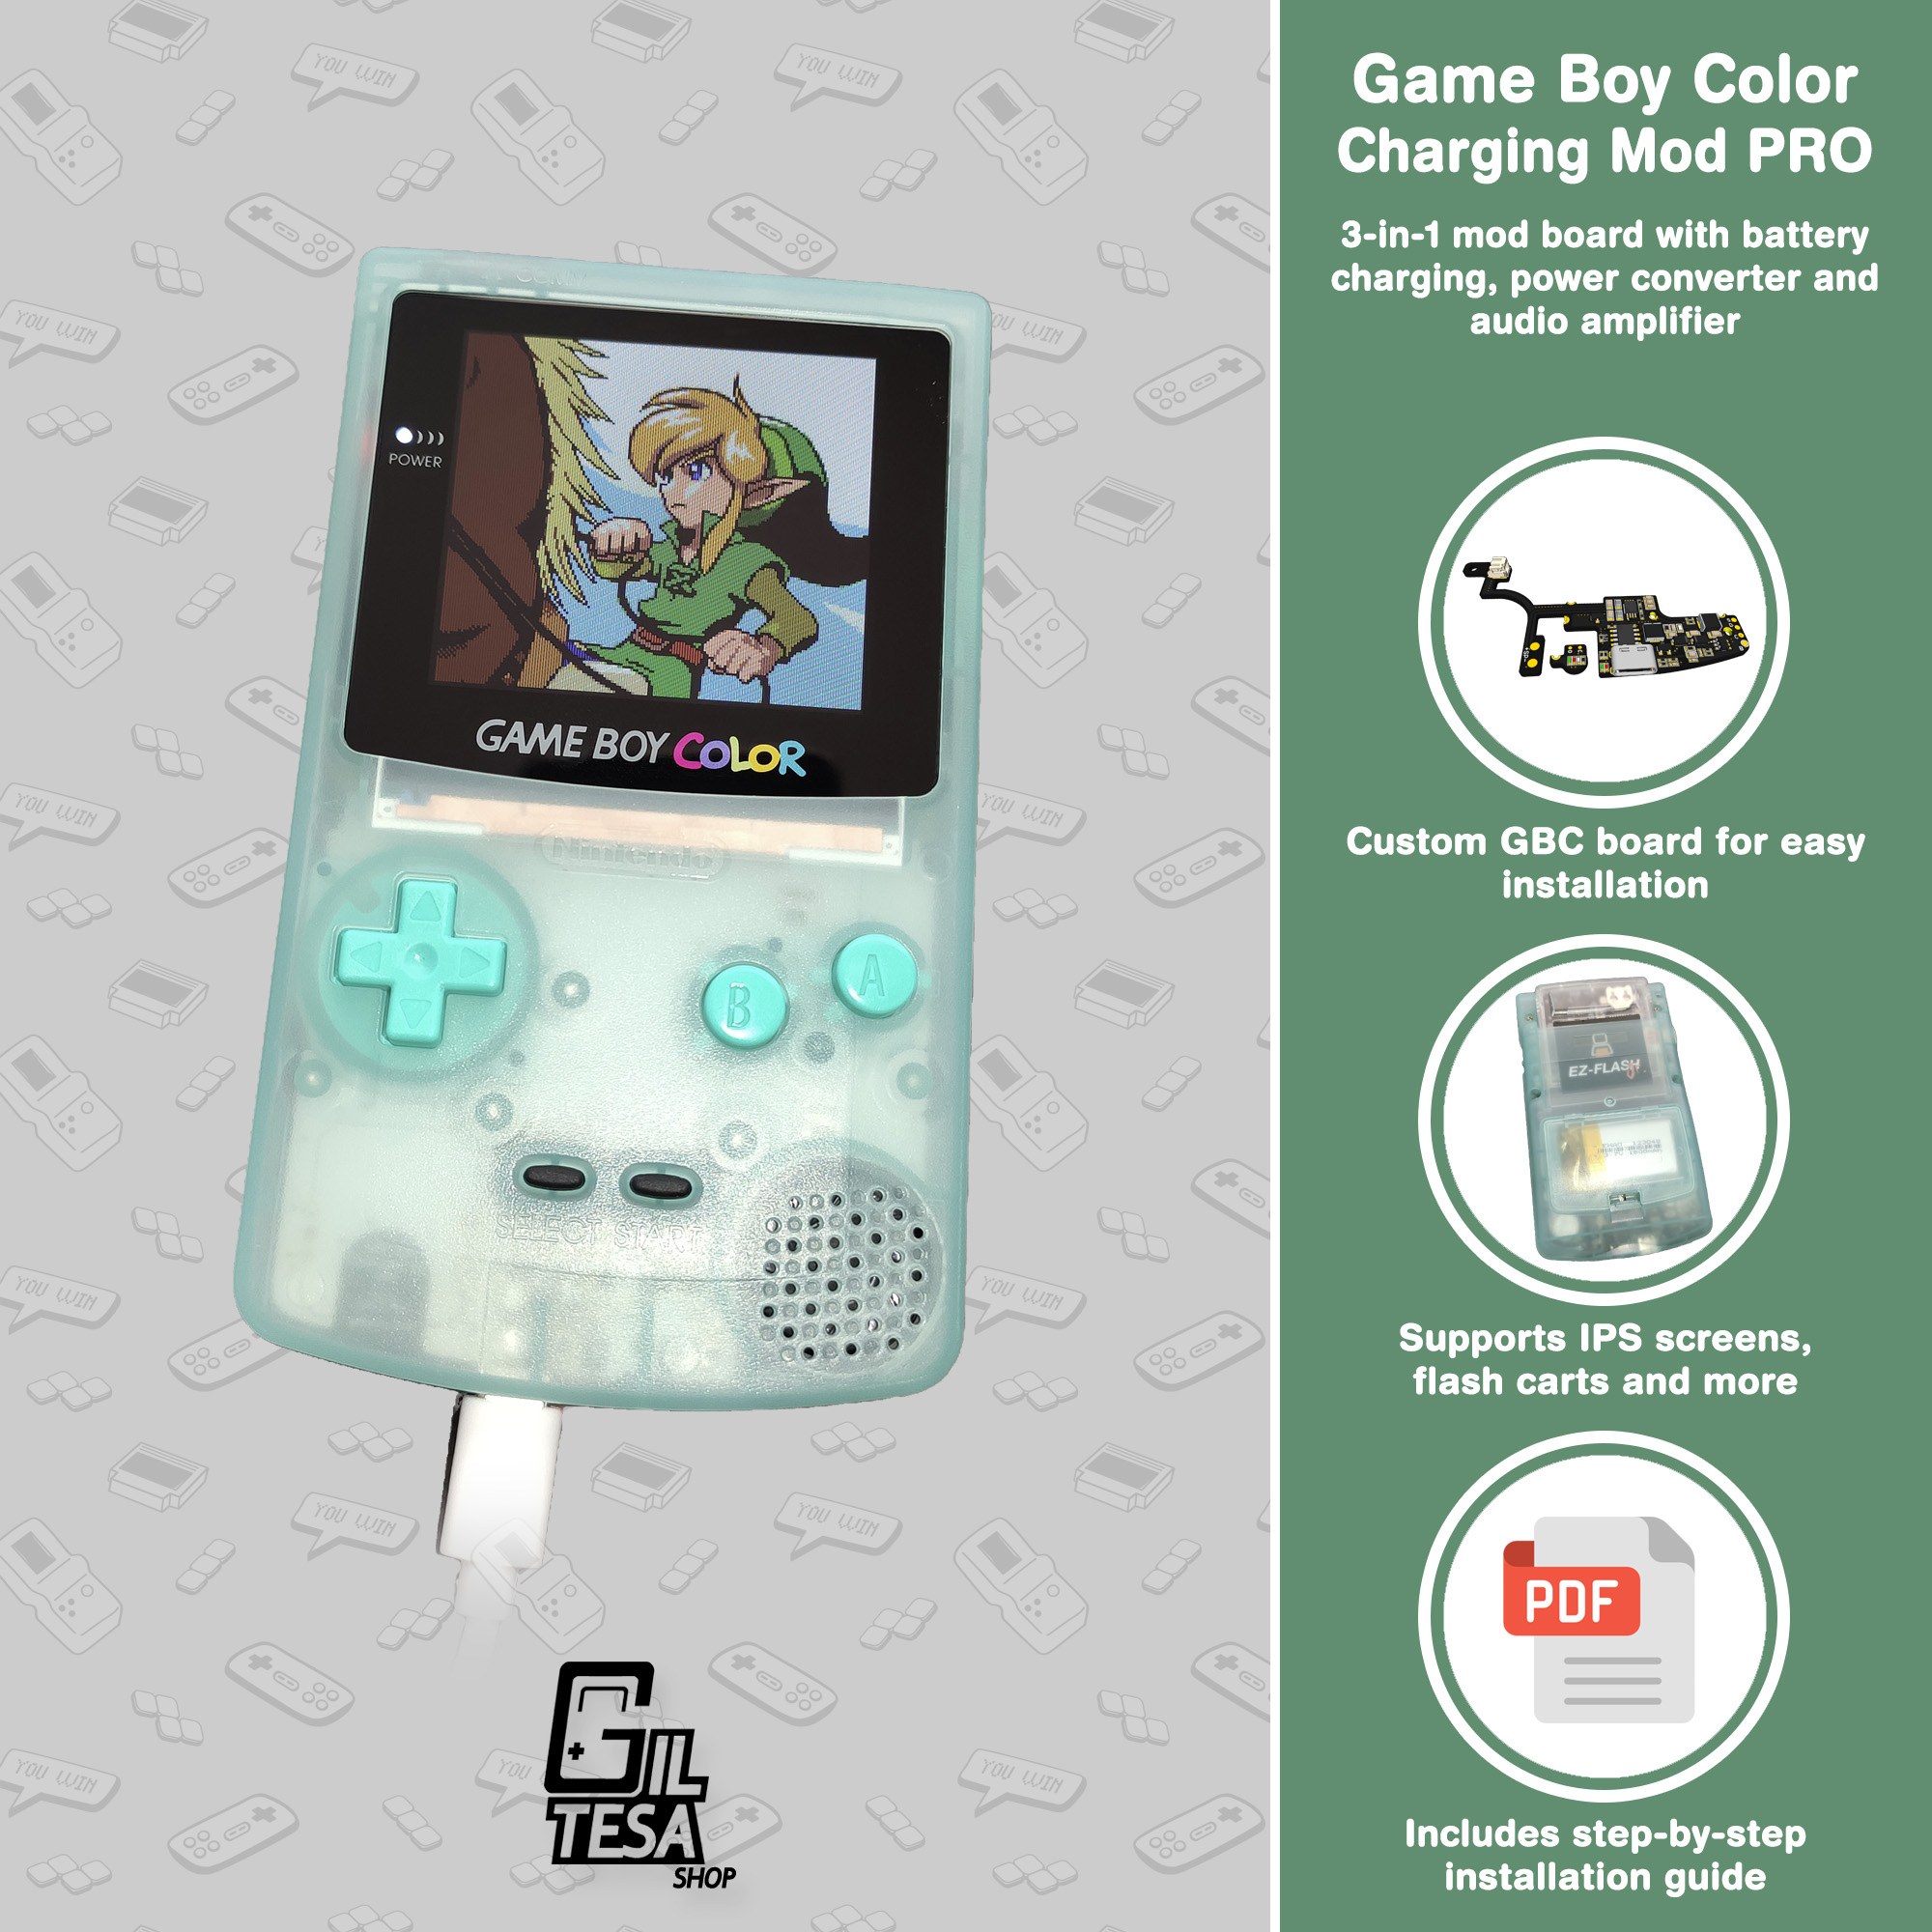
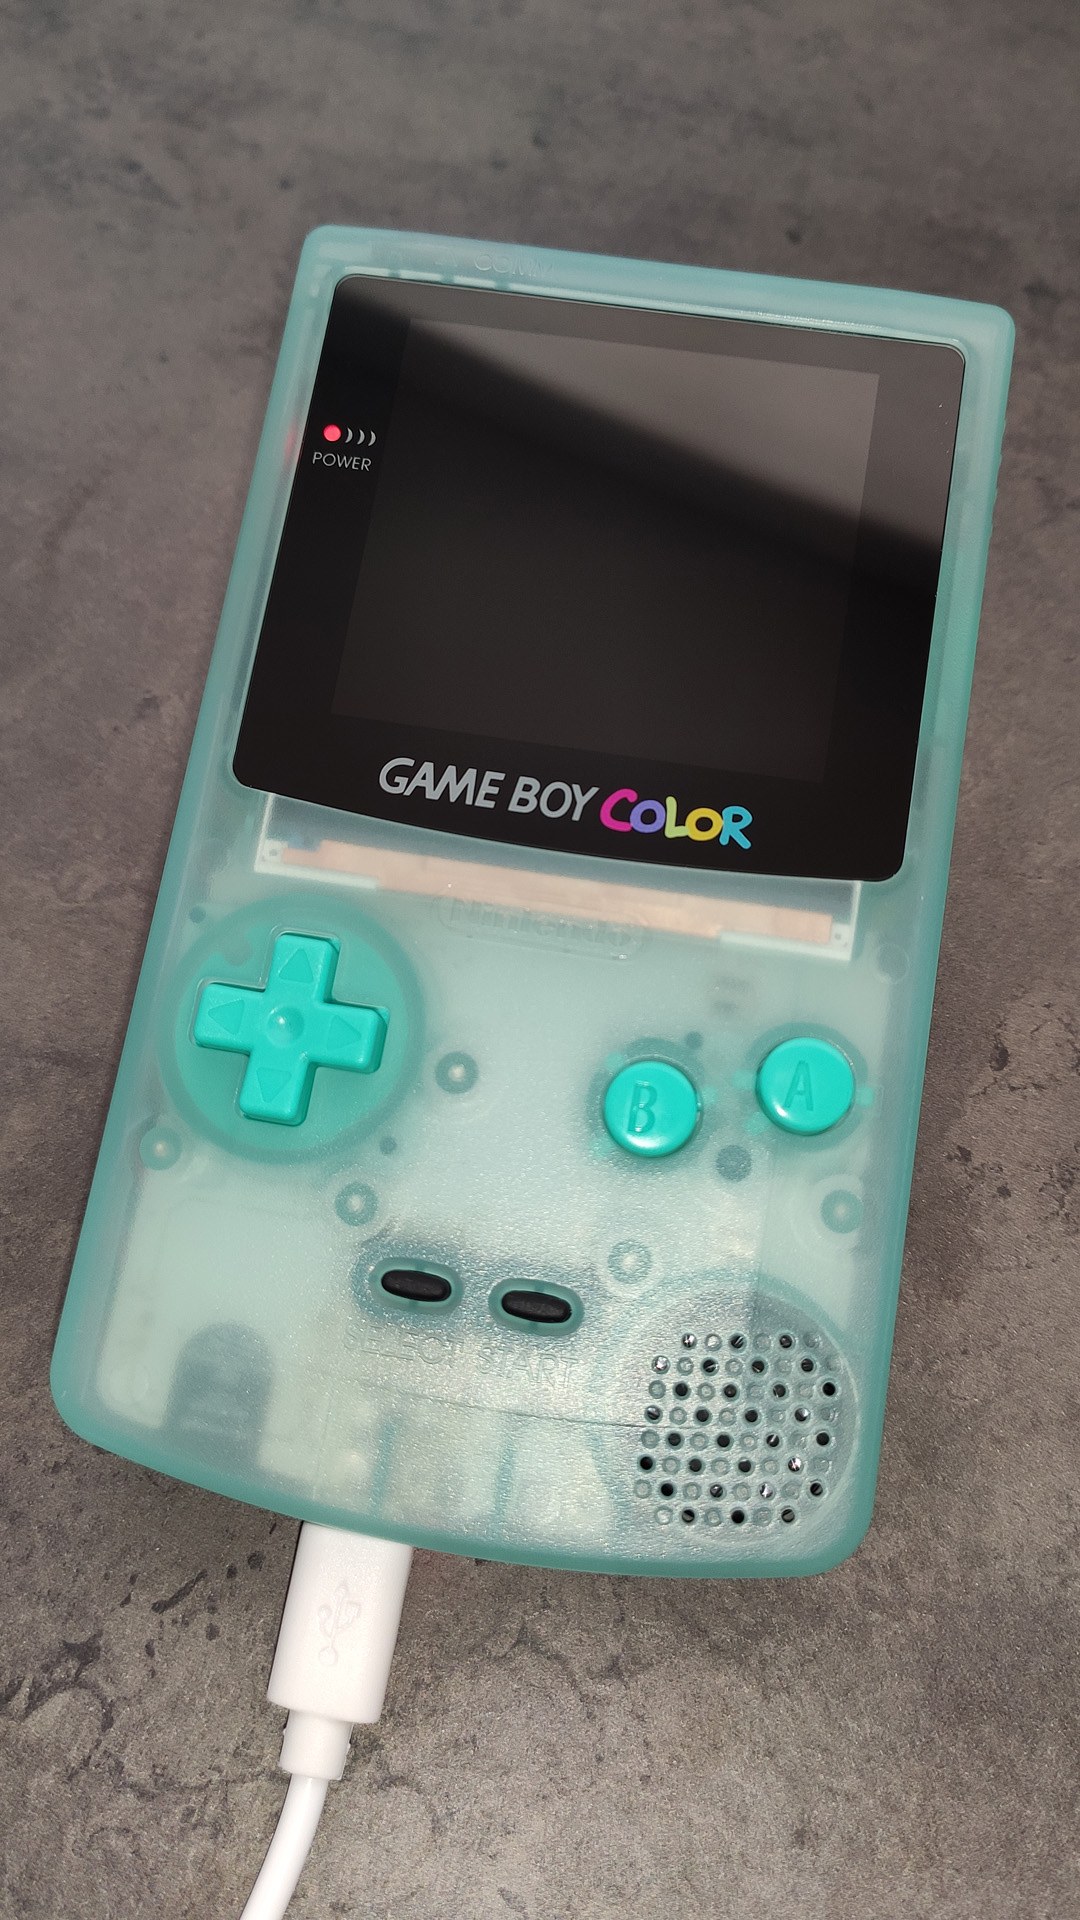
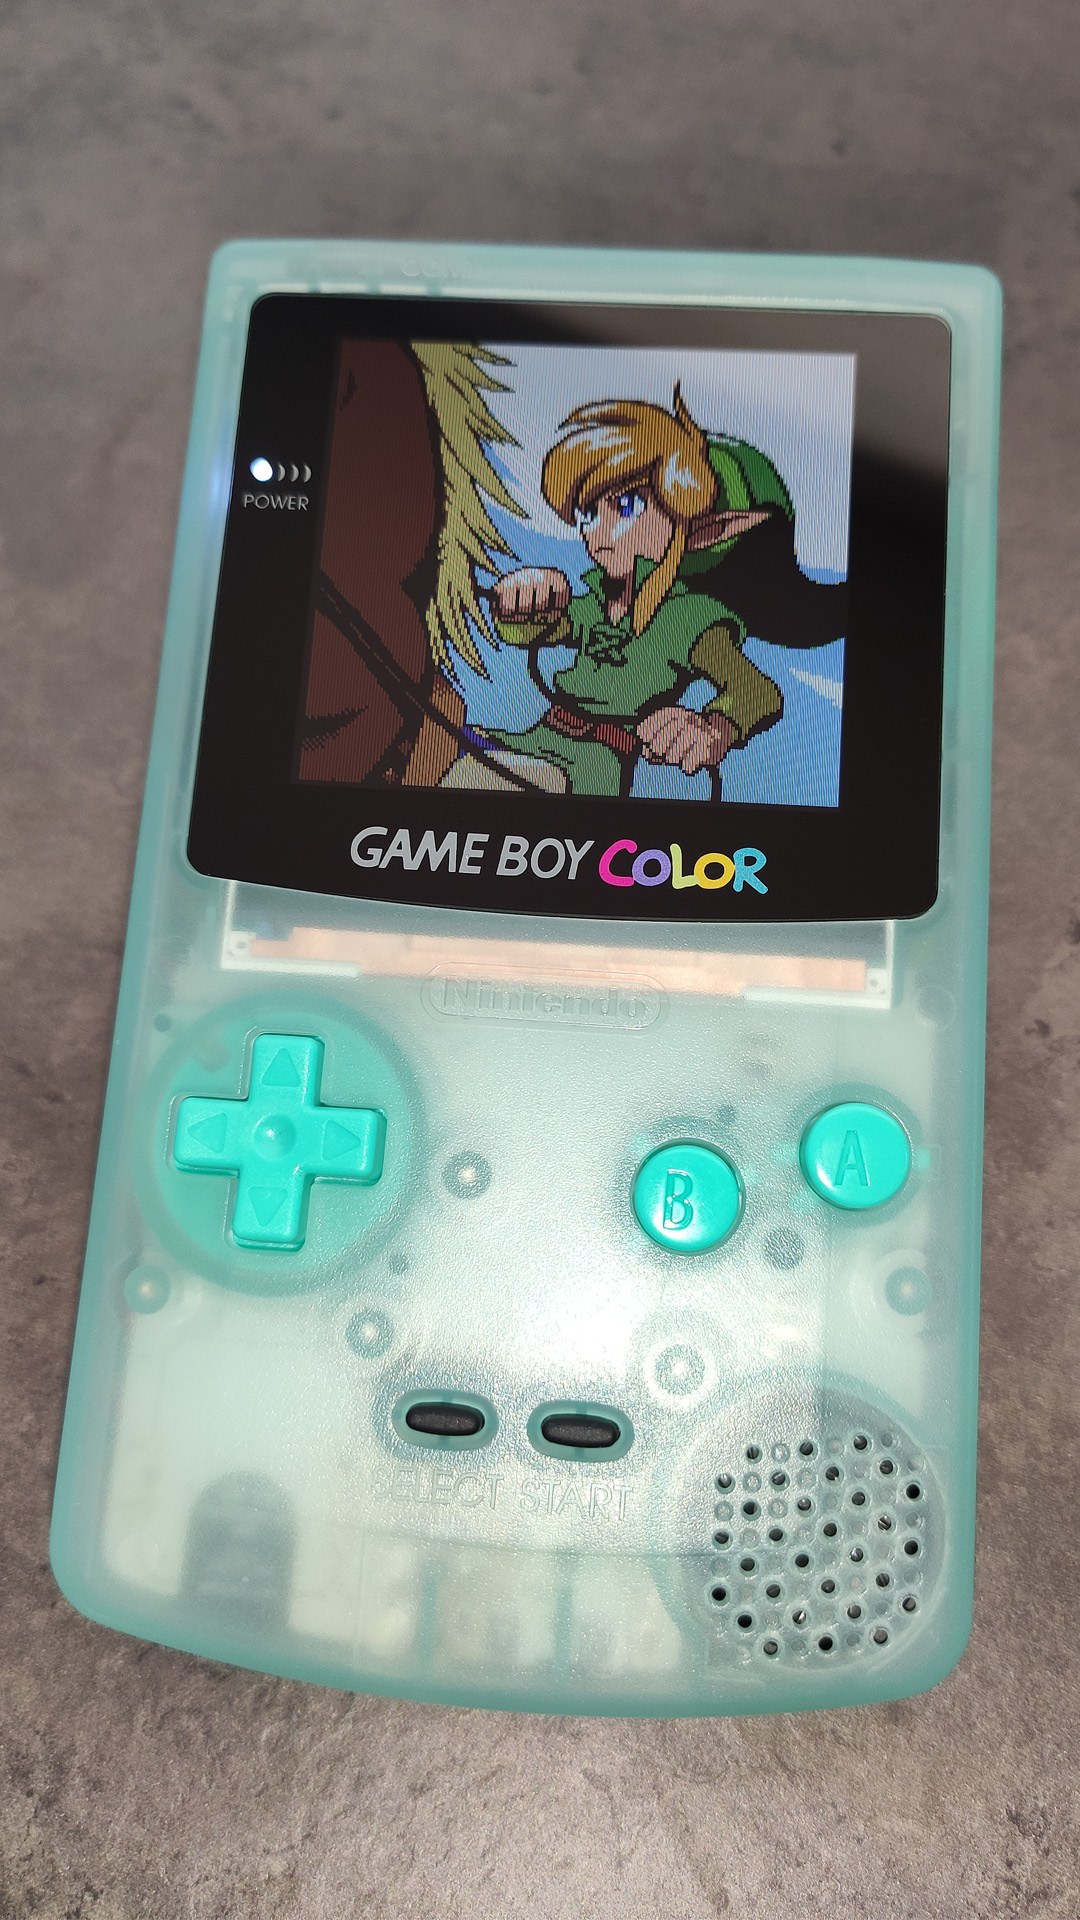
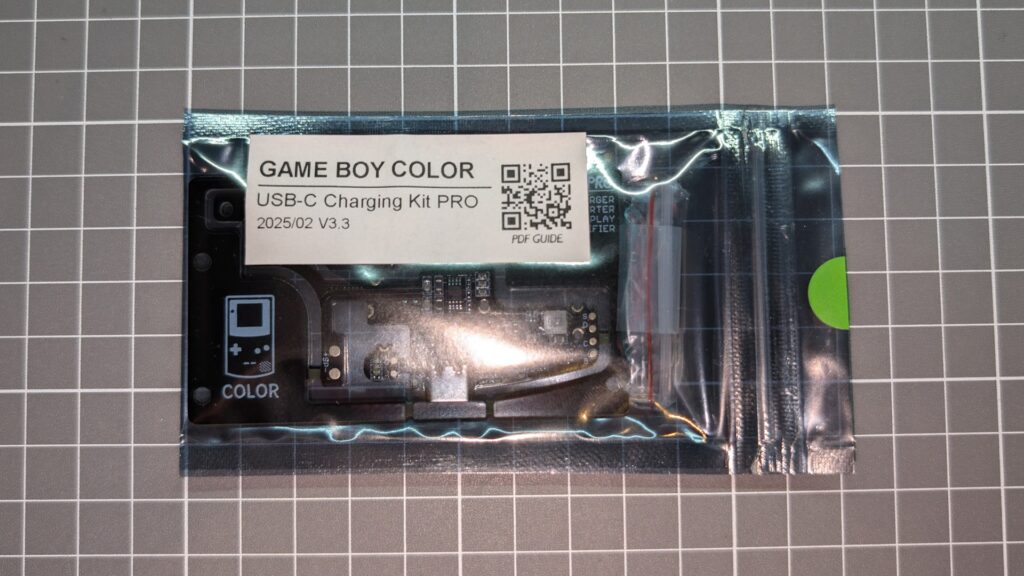
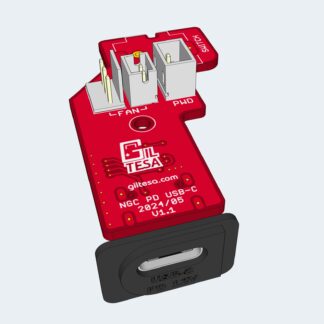
The Game Boy Color USB-C Charging Kit PRO is a new circuit designed specifically for the Nintendo Game Boy Color. This all-in-one circuit includes not only the charging controller but also a boost converter and audio amplifier.
Modern IPS displays with backlighting require more power than the original display, and flash carts used to load numerous games can quickly drain the battery. To truly enjoy the games, it is recommended to use a rechargeable battery instead of AA batteries.
However, simply using a rechargeable battery is not sufficient. The increased power consumption puts a strain on the original electronics, potentially causing noise in the speaker or headphones.
The typical solution is to add a charging circuit for the battery and a power converter to replace the old, inefficient one included in the GBC. Some individuals also add an audio amplifier to enhance the sound quality of the speaker. All these modifications make the GBC function optimally. However, installing them requires numerous cables and may be challenging for individuals without sufficient knowledge.
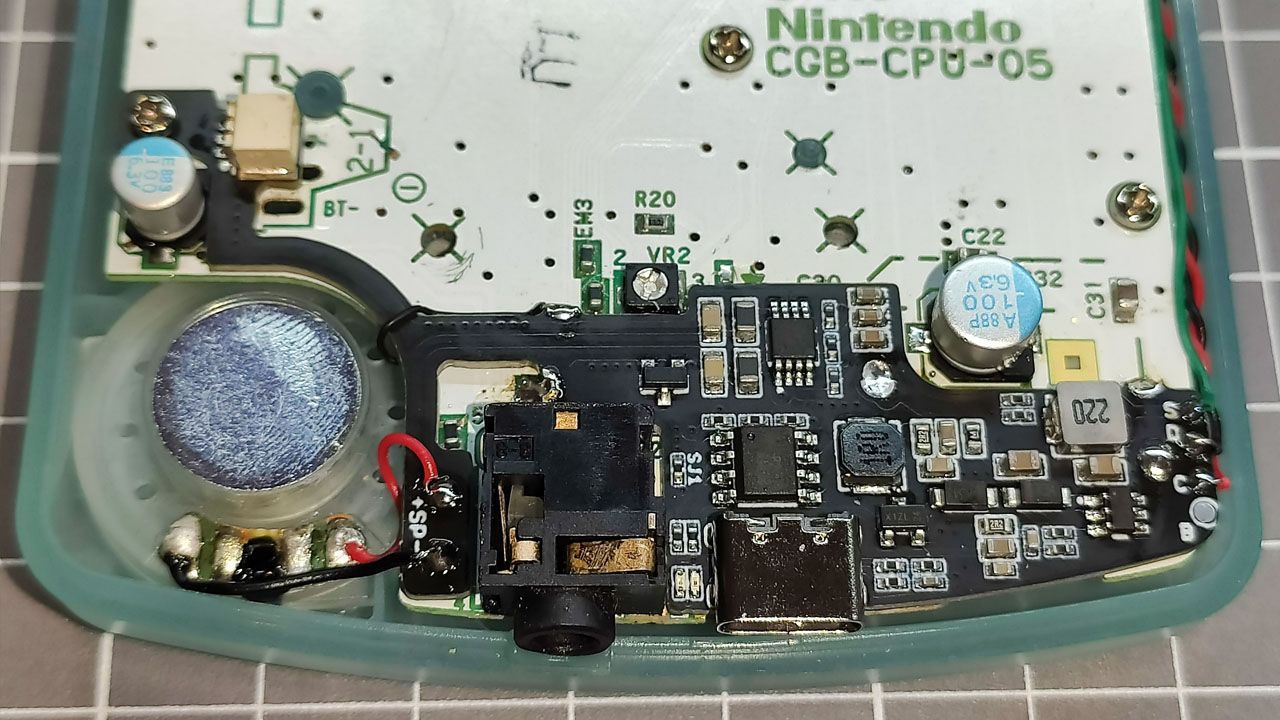
This board adds all these features with a clean and straightforward installation:
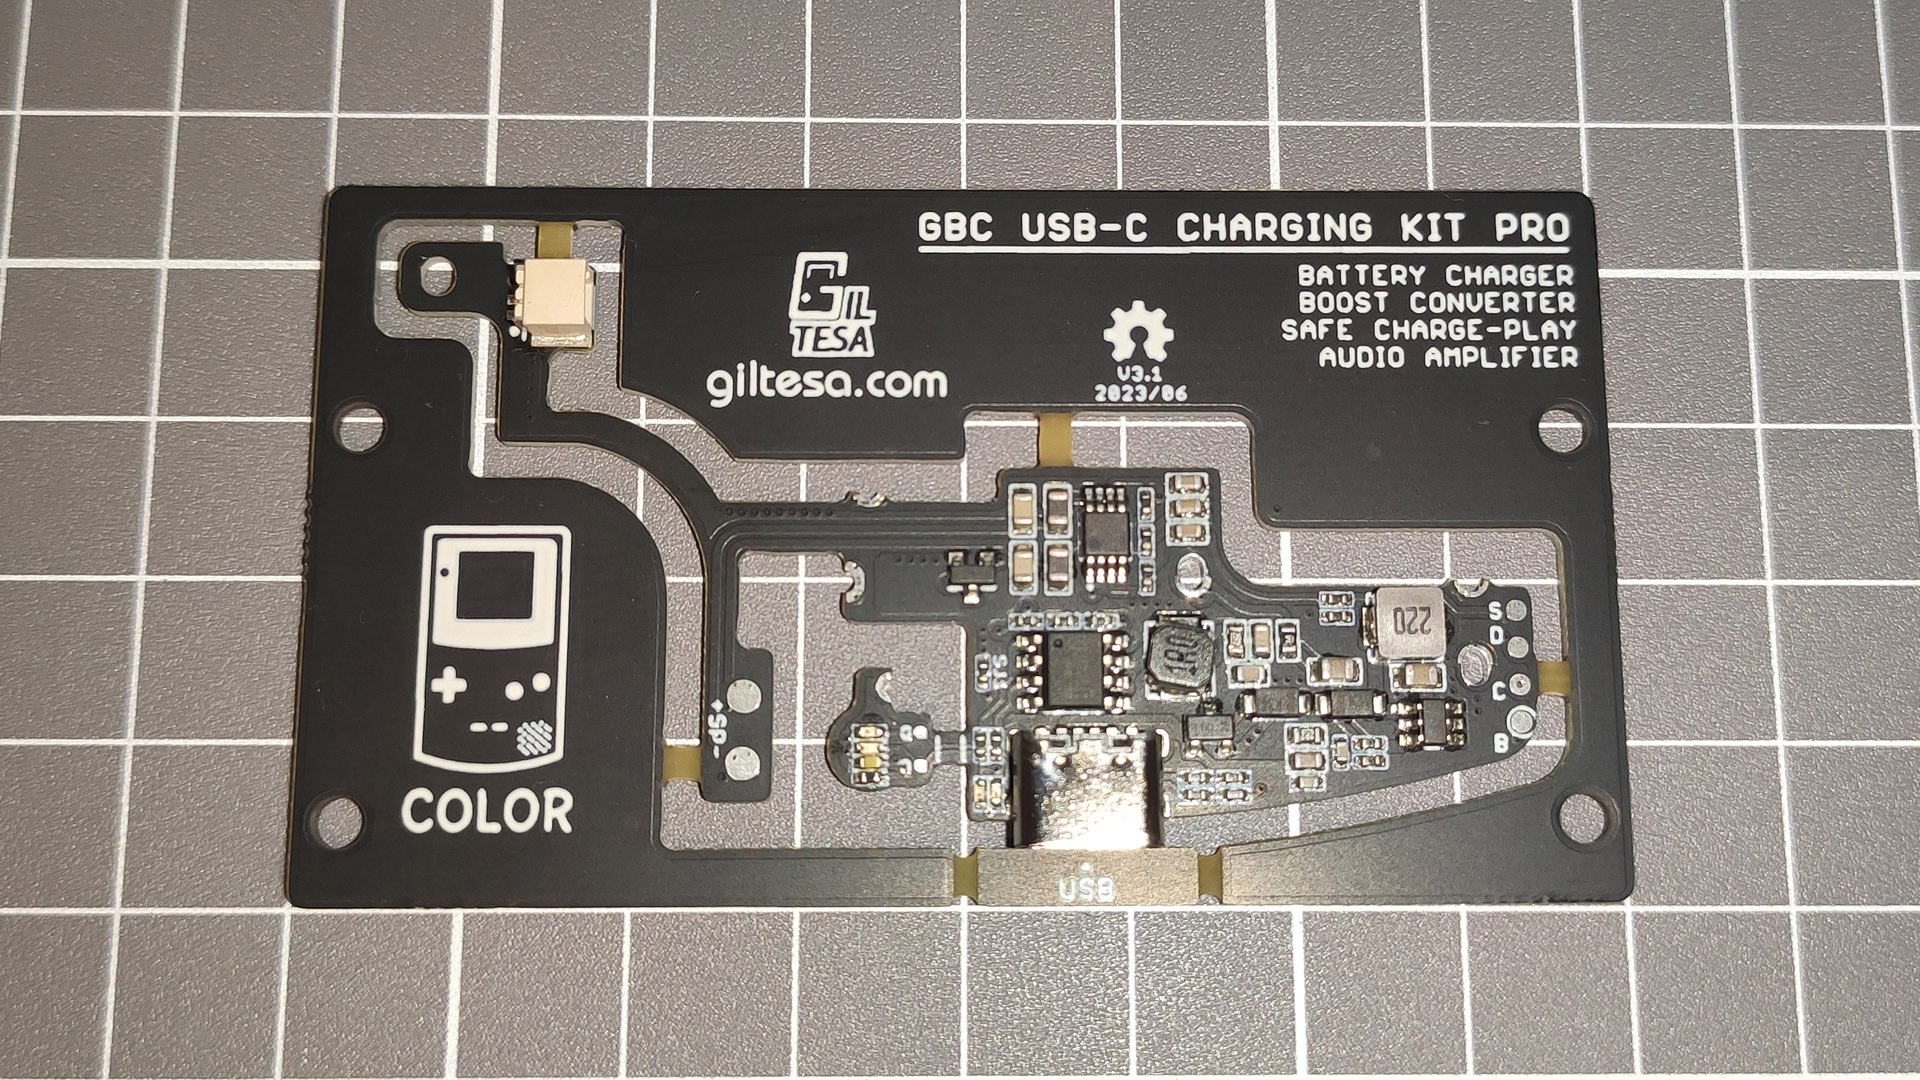
Board version 3.1
FEATURES
Exact shape for Game Boy Color.
Li-Ion battery charger via USB-C with overvoltage and undervoltage protection.
DC to DC converter with 5V output. (The board doesn’t support the original screen, only IPS screens are supported)
Safe charge and play (from v3.1).
Audio amplifier for the speaker.
Integrated LED indicators on the main board, next to the USB port, for charging the battery (red) and full battery (green). These can be disabled via the SJ1 jumper.
External LED indicators board for playing (white), charging the battery (red), and full battery (green). Optional installation.
INCLUDED
1 frame panel, which includes the two boards:
Main board.
Light board.
1 battery cable (with JST SH1.0 connector)
1 two-wire cable for connecting the light board.
1 single-wire cable for connecting the board to the sound pad.
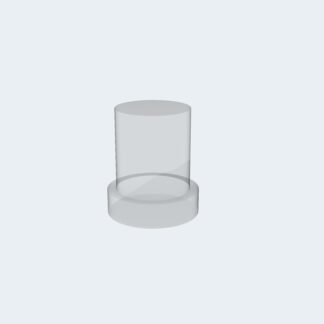
1 light diffuser pipe.
REQUIRED (NOT INCLUDED)
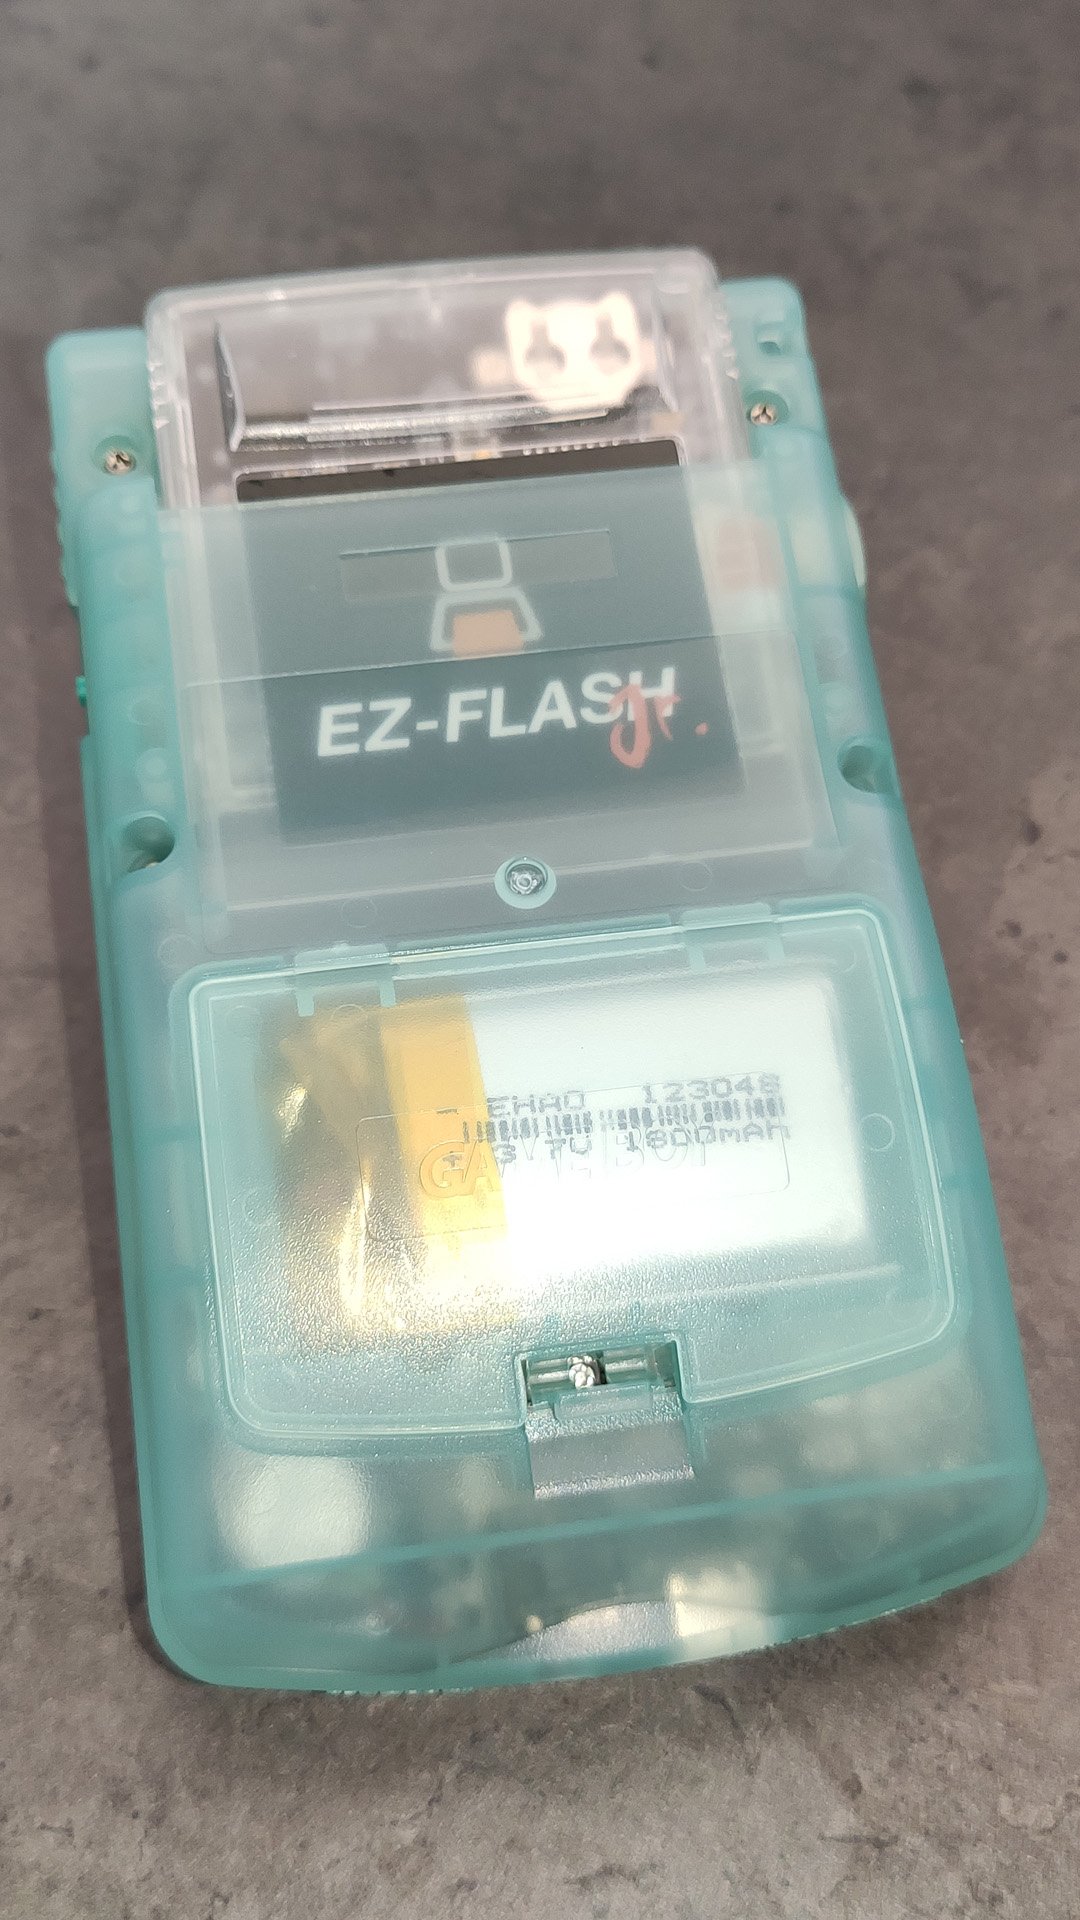
Li-ion battery (for example, 123048, perfect for an IPS V3 laminated screen shell)
New 8Ω 1W speaker (optional but recommended to avoid noise, for example, this one)
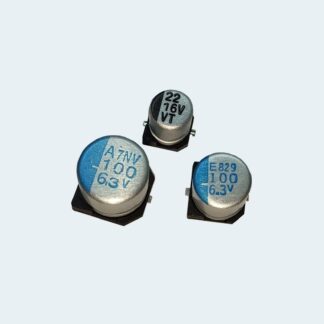
New capacitors (optional but recommended to avoid noise)
The latest version is 3.3. This is a note for v2.3, which doesn’t properly support “Safe charge and play.” Please, DO NOT charge and play at the same time to avoid any problems. (Read more about it here)
The intro of some games: system sound 100%, audio amp 50% and speaker 8Ω 1W
Battery test
This video shows a GBC running for 6 hours and 30 minutes. It did it with an IPS V3 laminated screen with the brightness at 100%, the system sound at 100%, the amplifier sound at 50%, playing the games from a flash card and using a 1800mAh battery.
Charging and Playing test
This video shows a GBC charging and playing a game for about 2 hours. It did it with an IPS V3 laminated screen with the brightness at 100%, the system sound at 20%, the amplifier sound at 50%, playing the games from a flash card and using a 1500mAh battery.
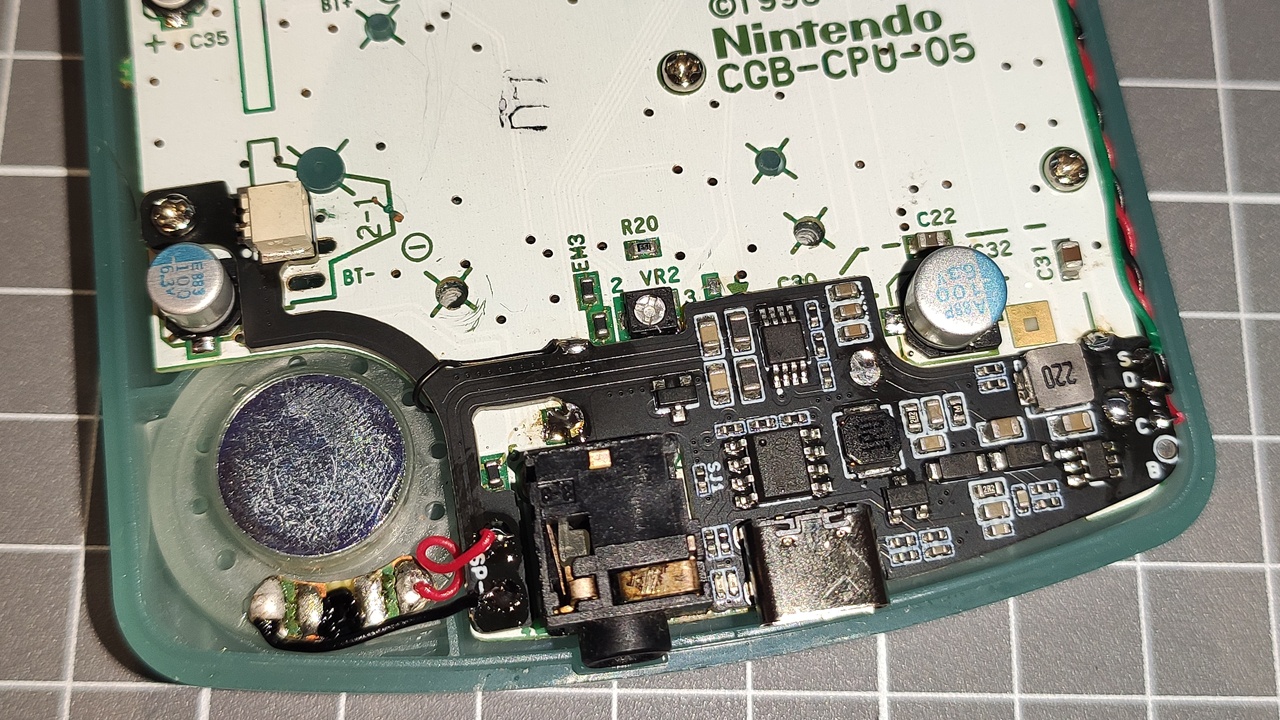
Installing the board on the GBC
This video shows the installation progress of the board on the GBC.
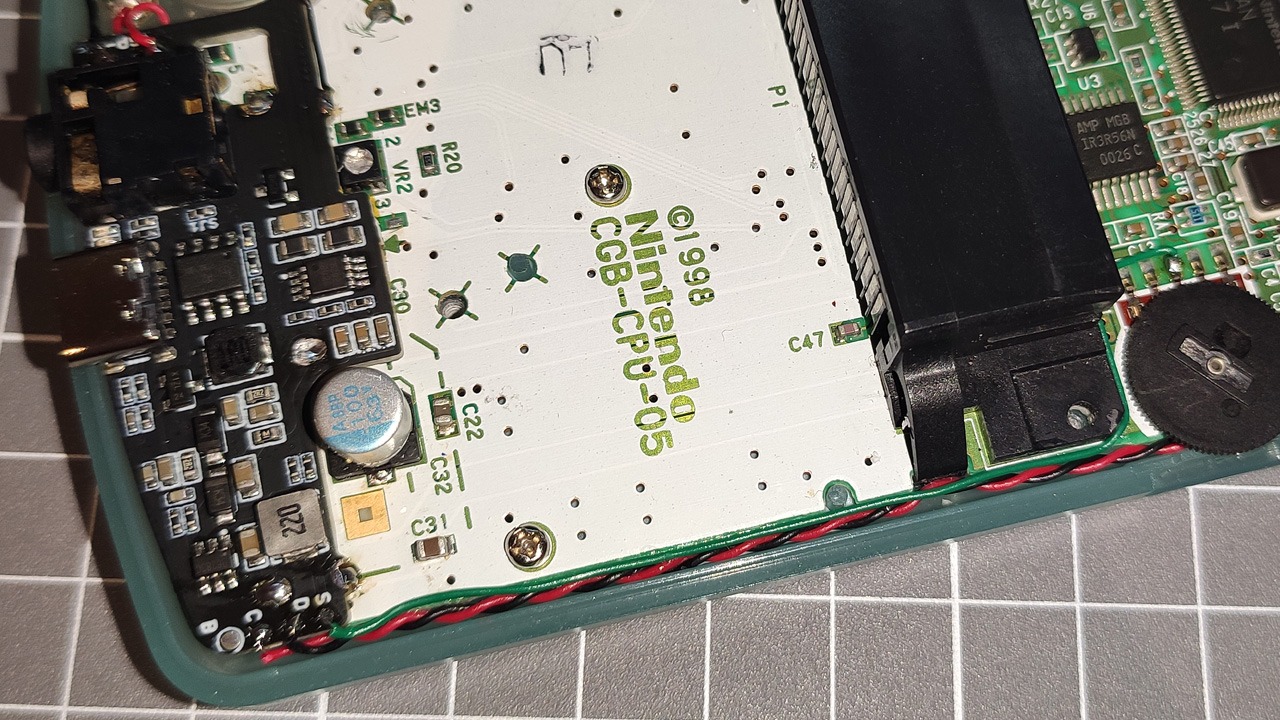
This board is compatible with the following version boards of GBC:
CGB-CPU-01
CGB-CPU-02
CGB-CPU-03
CGB-CPU-04
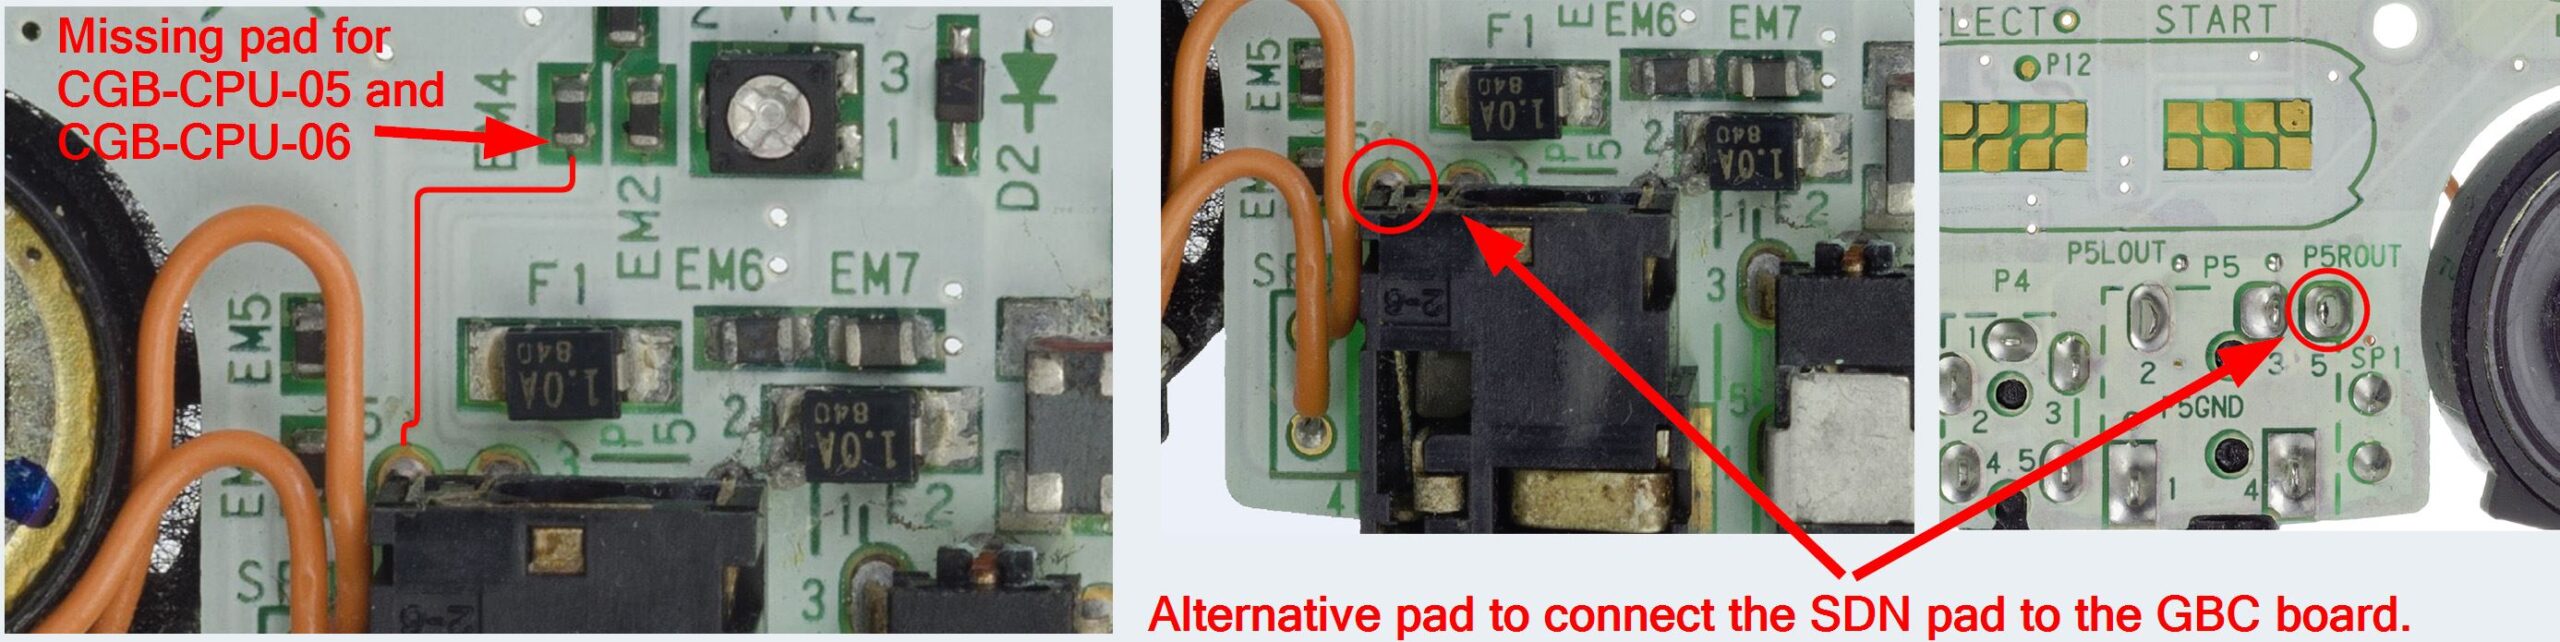
CGB-CPU-05 (1)
CGB-CPU-06 (1)
(1) These boards do not have the EM4 electronic component, one of the kit’s pads must be soldered there to detect if there are headphones connected to the audio jack. An alternative pad can be used for it:
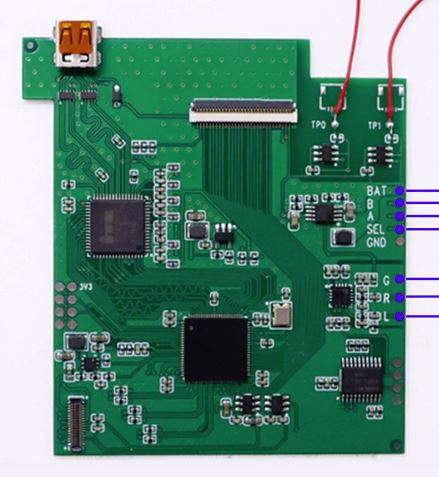
Some third party modules which people or I have tried and work well together this kit:
(2) This display has problems with charging kits and makes noise when you connect the power cable from the screen pad called “BAT” to the “C” leg from the power switch. Fortunately, if you use the GB+5V pad of the GBC PRO board instead of the switch leg, the noise will stop.
Another customer reported that even after soldering the wire to the GB+5V pad, the noise issues persist. I’m not sure if this is caused by another problem with his GBC or if the manufacturer has changed the screen. I contacted the manufacturer, and they stated that it cannot be powered directly with 5V; it needs to be used with AA batteries. So, it’s up to you what you install in your GBC.
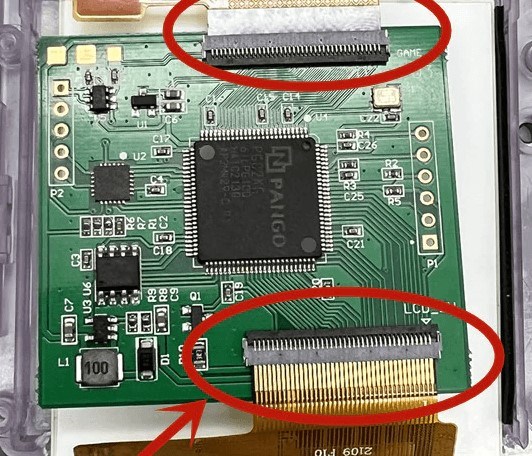
(3) This screen also needs a power cable from the flex cable to “GB+5V” pad, otherwise it won’t turn the screen on.
Frequently Asked Questions
Can I use the original screen?
No, you cannot. This board is only compatible with screens which work at 5V (IPS screens). The original screen needs another voltage.
The speaker doesn’t sound
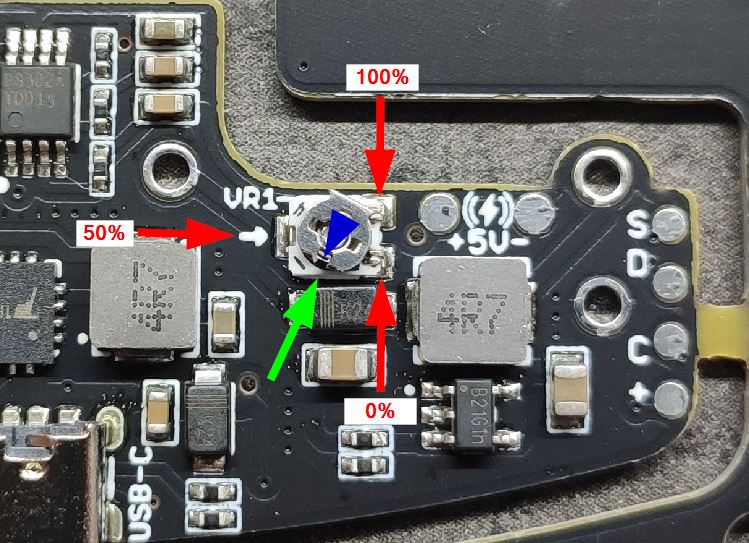
During the installation of the board, there is a green/blue cable that needs to be installed between the volume wheel to the board, you can find it inside the small bag.
If you have installed it, check the speaker is properly soldered and it is not broken.
The sound is too loud
The internal audio potentiometer, which is included in the board and is called VR1, is setup by default at 40%, you can decrease it a bit more if you need. See this picture. (Removed since v3.1)
Does the audio amplifier have a feature where audio is completely cut off or silent when the volume wheel is turned all the way down?
No, it doesn’t have that option, and if you have the volume wheel of the audio amplifier at 100% and the GBC volume wheel at 0% you can still hear a bit the sound… however it’s crazy to have the internal volume wheel at 100% because is too loud. My recommendation is 50% or less.
The unique way to have 100% disconnected the sound is connecting the audio jack because it makes sleep the audio amplifier.
Why are there two red and green lights?
The board include lights next to the USB-C and in the small light board. This small board is optional, you don’t need to install it if you don’t want or it’s too difficult for you. But if you do, my recommendation is removing the small resistance called SJ1 with your solder iron, that is going to disable the lights next to the USB-C. If in the future you want to active it again, you just need to put a drop of tin because the resistance has a value of 0, it’s just a jumper/cable.
Does the white led indicate the battery level?
Yes, it works as before, when the battery is decreasing the capacity, the light is going to be less brightness. However, I think this effect is more appreciable with the original led because the red color. You have a video demonstration in the “Additional content (videos)” tap.
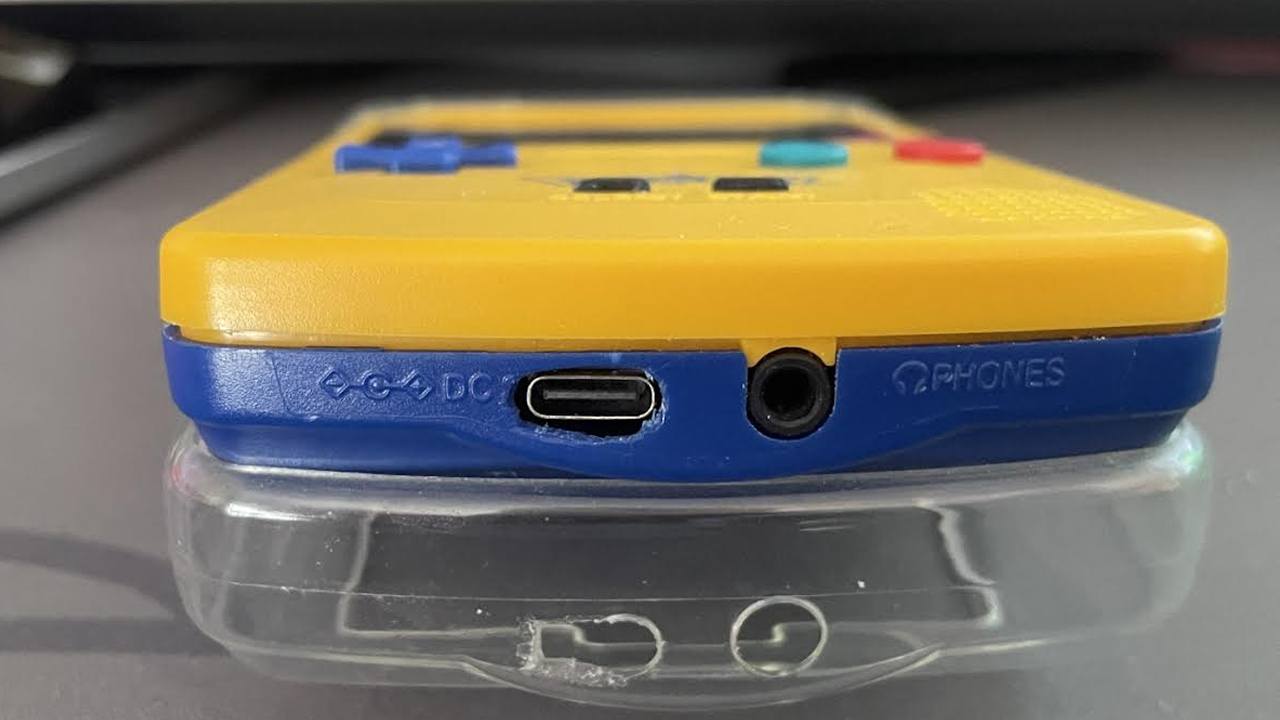
Can you use type-c to type-c cables with this board?
Yes, you can. Except the GBA SP board, the rest accept USB-C to USB-C cables and charge with any charger, fast chargers too but a normal speed.
Can I play and charge the battery at the same time? (Safe charge-and-play)
The electronic board support this feature since v3.1. Previous versions don’t support it and you shouldn’t play and charge at the same time.
Do I need to solder the extra power cable of my IPS screen?
I don’t know sure, for my screen that I guess it’s a copy I don’t need to solder any cable to the screen, just connect it and works perfect. However, I have seen someone who needed to solder it otherwise the backlight doesn’t work. So, you can try first without that cable and if it doesn’t work follow the instructions of your screen and solder the cable.
The GBC doesn’t turn on.
If you have replaced the capacitors in your GBC, make sure that the capacity is the same as the original capacitors. Otherwise, this may cause the console not to turn on, or only turn on when connected via USB-C.
Changelog
2022-02: v1.0 (Not commercialised)
Initial version, it was made with Texas Instruments ICs, worked well except the audio didn’t turn off when the earphones were connected.
2022-03: v1.1 (Not commercialised)
Fixed the problem with the audio, however I needed to cancel it because the out of stock of ICs and expensive price.
Improved the way to solder the board, it’s easier now.
2022-05: v2.0 (Not commercialised)
Modified the charging and DC converter ICs for another ones with more stock.
Changed the place where the Qi pads were because was in the middle of a screw hole
2022-06: v2.1 (8 units)
Modified the audio ICs for another one with more stock.
2022-07: v2.2
Added extra vias to be sure the V_BATT and SDN pad connection are correct because depending on the castellated hole quality can make the installation a bit tricky.
Other minor changes (separating a bit some components from the SJ1, changed the URL of the quick guide, etc.)
2023-01: v2.3
Added safe charge and play feature. The product needed to be discontinued from sales as it exhibited incorrect functionality under certain conditions.
2023-03: v3.0 (Not commercialised)
Tested the IP5310 battery charging IC, which has good features and works well. However, it also has drawbacks that lead me to reject it for this product.
2023-06: v3.1
Replaced the TP5000 battery charging IC to IP2312U.
Replaced the MT3540 boost converter IC to MT3608.
Replaced the SI2301 load sharing mosfet to AO3401A.
Limited the maximum battery charging current to 0.68A.
Limited the maximum current supplied with a 1.25A fuse.
Eliminated the audio potentiometer used for controlling the audio amplifier level (There is not space for it)
Modified the shape of the two pads inside the board to have a bigger hole and help to solder them.
Decreased the brightest of the LEDs.
Changed the VIN pad as half hole.
Added a battery pad, next to the pads for the light board and sound, which may be used in the future for other product.
Modified the light board from 3 wires to 2 wires.
Modified the frame shape, it allows to test the board before separate the board from it.
Improved light diffuser pipe now in clear white color.
2023-10: v3.2
Minor improvements of little consequence (Logos and texts with better quality).
2024-04: v3.3
Improved the light board pads to make them stronger.
2025-02: v3.3
No changes.
Gallery of customer's installation
If you are happy with your installation result, you can send us the photos and we can publish here, other clients will see the result!
Filipe:
18 reviews for Game Boy Color: USB-C Charging Mod PRO
Rated 3 out of 5
Etsy Reviews (verified owner)–
Stacy wrote: I thought i ordered a actual plug and cord for the Game boy what i got was a mother board to exchange out. Not sure that's what I was expecting. So unfortunately I cant give a rating because not sure what i am rating.
Rated 5 out of 5
justinkburke87 (verified owner)–
I’ve been wanting to install this Mod from the moment I saw a demo of it, and I finally worked up the courage to do it. It’s so cool and it along with a few other mods has brought my original Gameboy Color from 1998 back to life.
Rated 5 out of 5
Etsy Reviews (verified owner)–
John wrote: I was impressed with the shipping time: only took a couple weeks to arrive in the US from Spain! Install instructions are clear and concise. Board is built well and works great. Thank you for this!
Rated 5 out of 5
Etsy Reviews (verified owner)–
M wrote: Super Produkt, Installation mit Anleitung problemlos. Schneller internationaler Versand.
Rated 5 out of 5
Etsy Reviews (verified owner)–
Anthony wrote: Item was exactly as I was expected. It arrived very quickly for being an international shipment. Had to contact the seller and they replied nearly instantly, and were incredibly helpful.
Rated 5 out of 5
Etsy Reviews (verified owner)–
Jordan wrote: The item arrived in good condition
Rated 3 out of 5
Etsy Reviews (verified owner)–
Edgar Tshatshu wrote: Not much information given to use
Rated 5 out of 5
sgtmcheflamon (verified owner)–
Vraiment super ! J’ai reçu aujourd’hui et j’ai installé immédiatement ! Ca fonctionne super bien avec écran Oled. Pas de bruit aux haut-parleurs, le son est top ! La charge fonctionne bien ! Super qualité
Rated 5 out of 5
Etsy Reviews (verified owner)–
Josh wrote: Came as described, very easy to install and works fantastic
Rated 5 out of 5
davidrahdneto (verified owner)–
Perfect mod for a perfect modern gameboy color experience.
First, Giltesa is not only a great contributor to the retro videogame community with his creations, he is also a great guy, I had problems with Brazilian’s customs and he was very helpful and stayed in touch until I got the board.
The kit is amazing, great quality and design, the installation is simple if you already have some soldering practice. The hardest part was the optional led board, it is a very small piece and it needs to be soldered from under the board, but if you have a clean translucent case the leds on the charging board are enough, making this optional.
The PDF installation guide is very well detailed, fallow it and you will not have problems.
I can get around 6h of gameplay with a backlighted screen, and it takes only around 2h to charge with a 5v charger. It supports higher charging sources but I didn’t tested with those enough to see if it makes a difference in a total charging time. Also it supports safe charging, meaning you can play while it is charging.
Great for every retro gamer fan of the old gameboy color who wants a more convenient and modern way to enjoy and revisit your memories of the classic old school games but still using the original hardware. Pair it with a good backlight screen and it will be the perfect gameboy color.
I can’t recommend enough. 10/10
Rated 5 out of 5
Etsy Reviews (verified owner)–
Angel wrote: – high quality item – item as described – item has met expectations ????
Rated 5 out of 5
billy.rebecchi (verified owner)–
What an incredible product. It takes a bit of work to get the board prepped, but once you’re there, installation is fast and seamless.
I purchased an EEMB 883048 battery from Amazon (1300mAh) and it is a perfect fit for the repro shell that I bought from FunnyPlaying.
I did a test run for cutting by using an old case and decided not to use the jig for my final build and freehanded with a rotary tool instead in order to get the basic shape and then used a bit of sandpaper wrapped around a thin screwdriver to get the final fit. It ended a bit deeper than I’d hoped but fits perfectly width wise.
I’m now wishing I’d bought the capacitor replacement as I’m getting a lot of buzzing with the new audio board. I’ll be fitting these after the fact.
Overall a fantastic and well thought through product which comes in a beautiful small package. Well done to the creator!
Rated 5 out of 5
Etsy Reviews (verified owner)–
Steven Mortensen wrote: very nice design and I had fun installing it.
Rated 5 out of 5
ymezquitam (verified owner)–
Excellent product, I bought two and for now I have only installed one. Really good job there. I used a pair of batteries with the AA shape, so have in mind that won’t be the best fit because of the connector. But it is good that you only have to do minimal trimming.
Rated 5 out of 5
Etsy Reviews (verified owner)–
Filipe wrote: Amazing quality! Hope the seller can keep making such amazing mods
Rated 5 out of 5
asdf.tgz (verified owner)–
Awesome little quality board. Super easy to install, and the instructions are easy to follow. Giltesa also personally helped me debug an issue I was having, that was totally my fault. Highly recommend getting one of these for your Game Boy Color.
Rated 5 out of 5
Leon Hill (verified owner)–
Work great and I have all ready order another one
Rated 5 out of 5
coreyosaur (verified owner)–
Excellent! Thank you so much for your dedication to design and manufacture this!
1) No more power issues w. Funnyplaying Q5 2.0 IPS laminated display! Woohoo! Any brightness is OK! Everdrive X7 OK!
2) Audio is clear, headphones work, I don’t dare touch 100% vol hahah! (New caps + FP speaker)
3) Li battery setup is perfect! The battery LED mini board is challenging to install but worth it. White fades as power is low. Able to plug-in/unplug while playing. (Stock GBC can’t do that!) SOOO convenient. Battery life is fantastic on a 103048 cell and there is still room for a thicker battery.
Removing components is difficult for beginners. I had to trim my funnyplaying shell to clear the new PCB in a few spots. That may be difficult with an opaque shell. I milled the USB-C slot with a dremel and tiny ~3mm endmill by eye since I forgot to buy the template in my first order. It took a lot of adjusting to get right. I recommend the template.
Immediately bought another to make a GBC for a family member. Thank you!
Only logged in customers who have purchased this product may leave a review.


Etsy Reviews (verified owner) –
Stacy wrote: I thought i ordered a actual plug and cord for the Game boy what i got was a mother board to exchange out. Not sure that's what I was expecting. So unfortunately I cant give a rating because not sure what i am rating.
justinkburke87 (verified owner) –
I’ve been wanting to install this Mod from the moment I saw a demo of it, and I finally worked up the courage to do it. It’s so cool and it along with a few other mods has brought my original Gameboy Color from 1998 back to life.
Etsy Reviews (verified owner) –
John wrote: I was impressed with the shipping time: only took a couple weeks to arrive in the US from Spain! Install instructions are clear and concise. Board is built well and works great. Thank you for this!
Etsy Reviews (verified owner) –
M wrote: Super Produkt, Installation mit Anleitung problemlos. Schneller internationaler Versand.
Etsy Reviews (verified owner) –
Anthony wrote: Item was exactly as I was expected. It arrived very quickly for being an international shipment. Had to contact the seller and they replied nearly instantly, and were incredibly helpful.
Etsy Reviews (verified owner) –
Jordan wrote: The item arrived in good condition
Etsy Reviews (verified owner) –
Edgar Tshatshu wrote: Not much information given to use
sgtmcheflamon (verified owner) –
Vraiment super ! J’ai reçu aujourd’hui et j’ai installé immédiatement ! Ca fonctionne super bien avec écran Oled. Pas de bruit aux haut-parleurs, le son est top ! La charge fonctionne bien ! Super qualité
Etsy Reviews (verified owner) –
Josh wrote: Came as described, very easy to install and works fantastic
davidrahdneto (verified owner) –
Perfect mod for a perfect modern gameboy color experience.
First, Giltesa is not only a great contributor to the retro videogame community with his creations, he is also a great guy, I had problems with Brazilian’s customs and he was very helpful and stayed in touch until I got the board.
The kit is amazing, great quality and design, the installation is simple if you already have some soldering practice. The hardest part was the optional led board, it is a very small piece and it needs to be soldered from under the board, but if you have a clean translucent case the leds on the charging board are enough, making this optional.
The PDF installation guide is very well detailed, fallow it and you will not have problems.
I can get around 6h of gameplay with a backlighted screen, and it takes only around 2h to charge with a 5v charger. It supports higher charging sources but I didn’t tested with those enough to see if it makes a difference in a total charging time. Also it supports safe charging, meaning you can play while it is charging.
Great for every retro gamer fan of the old gameboy color who wants a more convenient and modern way to enjoy and revisit your memories of the classic old school games but still using the original hardware. Pair it with a good backlight screen and it will be the perfect gameboy color.
I can’t recommend enough. 10/10
Etsy Reviews (verified owner) –
Angel wrote: – high quality item – item as described – item has met expectations ????
billy.rebecchi (verified owner) –
What an incredible product. It takes a bit of work to get the board prepped, but once you’re there, installation is fast and seamless.
I purchased an EEMB 883048 battery from Amazon (1300mAh) and it is a perfect fit for the repro shell that I bought from FunnyPlaying.
I did a test run for cutting by using an old case and decided not to use the jig for my final build and freehanded with a rotary tool instead in order to get the basic shape and then used a bit of sandpaper wrapped around a thin screwdriver to get the final fit. It ended a bit deeper than I’d hoped but fits perfectly width wise.
I’m now wishing I’d bought the capacitor replacement as I’m getting a lot of buzzing with the new audio board. I’ll be fitting these after the fact.
Overall a fantastic and well thought through product which comes in a beautiful small package. Well done to the creator!
Etsy Reviews (verified owner) –
Steven Mortensen wrote: very nice design and I had fun installing it.
ymezquitam (verified owner) –
Excellent product, I bought two and for now I have only installed one. Really good job there. I used a pair of batteries with the AA shape, so have in mind that won’t be the best fit because of the connector. But it is good that you only have to do minimal trimming.
Etsy Reviews (verified owner) –
Filipe wrote: Amazing quality! Hope the seller can keep making such amazing mods
asdf.tgz (verified owner) –
Awesome little quality board. Super easy to install, and the instructions are easy to follow. Giltesa also personally helped me debug an issue I was having, that was totally my fault. Highly recommend getting one of these for your Game Boy Color.
Leon Hill (verified owner) –
Work great and I have all ready order another one
coreyosaur (verified owner) –
Excellent! Thank you so much for your dedication to design and manufacture this!
1) No more power issues w. Funnyplaying Q5 2.0 IPS laminated display! Woohoo! Any brightness is OK! Everdrive X7 OK!
2) Audio is clear, headphones work, I don’t dare touch 100% vol hahah! (New caps + FP speaker)
3) Li battery setup is perfect! The battery LED mini board is challenging to install but worth it. White fades as power is low. Able to plug-in/unplug while playing. (Stock GBC can’t do that!) SOOO convenient. Battery life is fantastic on a 103048 cell and there is still room for a thicker battery.
Removing components is difficult for beginners. I had to trim my funnyplaying shell to clear the new PCB in a few spots. That may be difficult with an opaque shell. I milled the USB-C slot with a dremel and tiny ~3mm endmill by eye since I forgot to buy the template in my first order. It took a lot of adjusting to get right. I recommend the template.
Immediately bought another to make a GBC for a family member. Thank you!